This was a lesson from my printmaking class that I recently gave.
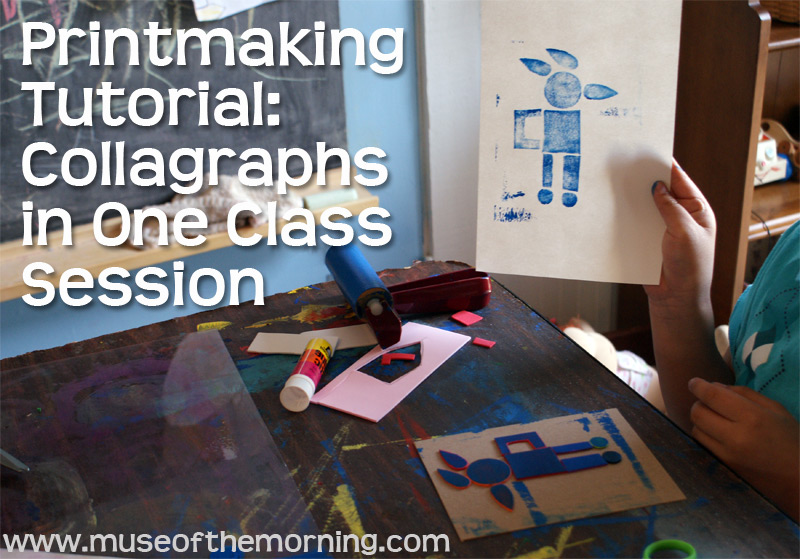
Collagraphy is an interesting way of making prints, so I really wanted to include it in the class. You generally use found objects- like the mesh that comes on your bags of onions, spaghetti noodles, or scrap fabric- which are then glued down on a surface, like matboard and then printed. The benefit to using these items, besides the recycling concept, is that they create a neat texture on your print, and you can even print without ink and just have an embossed image, like the first example on this thread at the Wet Canvas Forum.
The downside to making collagraphs is that you have to use a wet glue like mod podge and then you have to seal the printing plate so that the printing ink won’t ruin it right off the bat. Both of these processes take drying time and I was trying to have projects that could be completed in one hour and a half class session. This project will actually fit into a forty minute lesson and can be stretched to an hour or more depending on your time and inclination.
So, for this class, instead of found objects and wet glue, we’re using foam and glue sticks. This works really really well, except for on really tiny pieces, where the glue stick just doesn’t provide enough “stick”.
You’ll Need The Following:
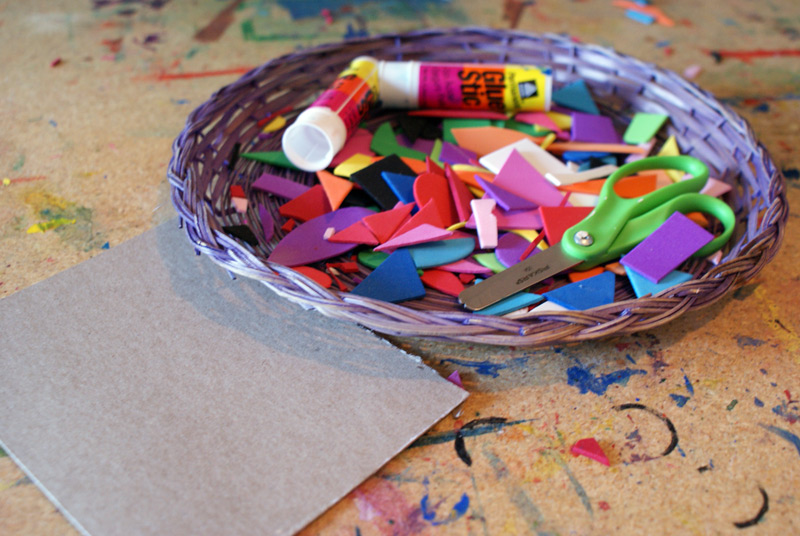
– a piece of matboard about 4x6inches for the plate. I used the cardboard back of sketch paper pads. I got the pads from The Dollar Tree – they’re actually a nice weight of paper. We use the paper for printing and backing for making collagraph plates!
– foam pieces- you can get sheets of foam or even sticky shapes! I got small sheets from the Dollar Tree and I got some of these large foam shapes from Discount School Supply.
– glue sticks
– scissors

– water based printing ink – you can also use acrylic paint, but it doesn’t roll out as well.
– a brayer or ink roller
– a platen for rolling out the ink- we use the same sheets of plexiglass that we used for the monoprints activity. You could use a cookie sheet, or the glass from a picture frame (just be careful with glass!!)
– a baren or burnisher (you could also use a wooden spoon or even your hands!)
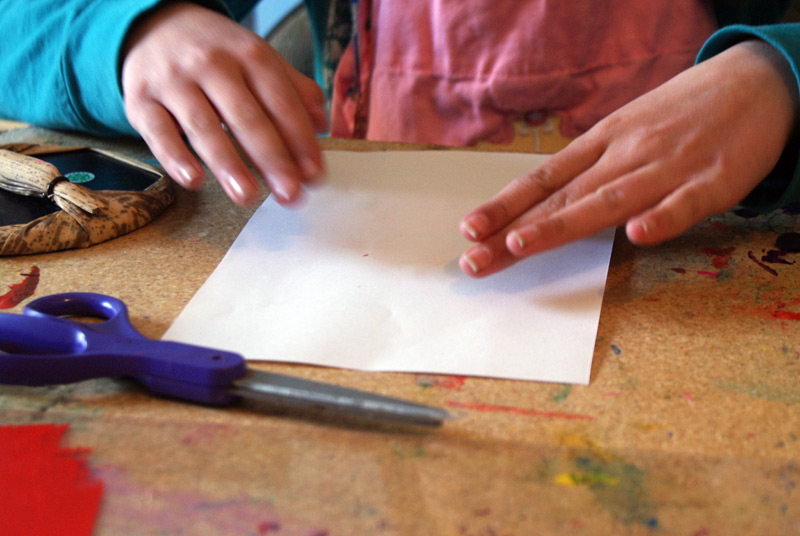
– paper for printing – sketch paper works just fine.
Ok, let’s get started!
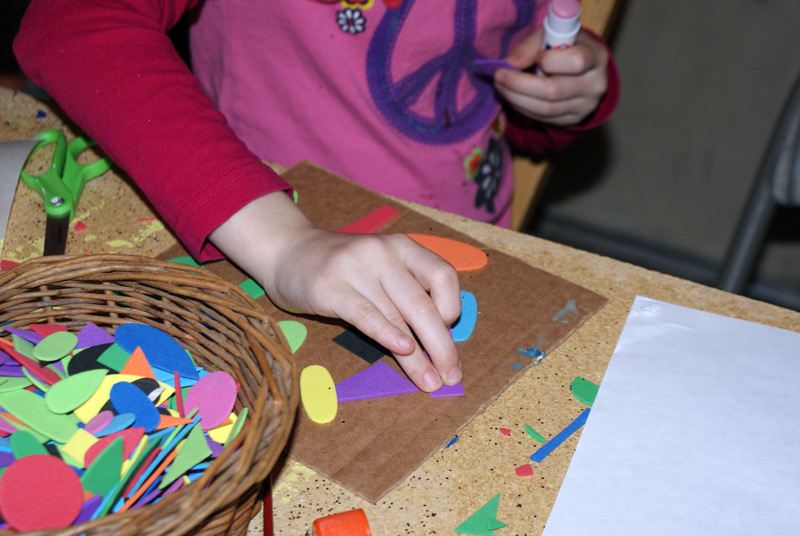
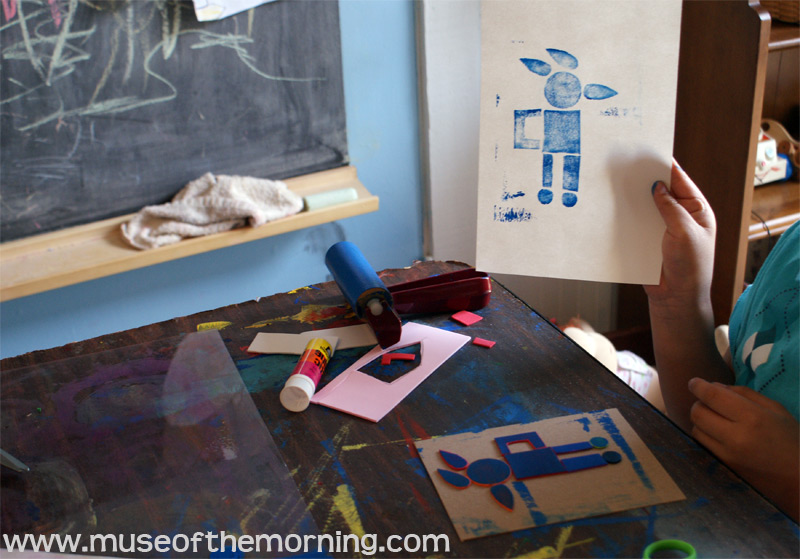
Present each child with a piece of the matboard. Then show them how the collagraph will be created, by gluing pieces of foam to the board. If you wish, have them plan out their design by sketching on a piece of paper or the matboard.
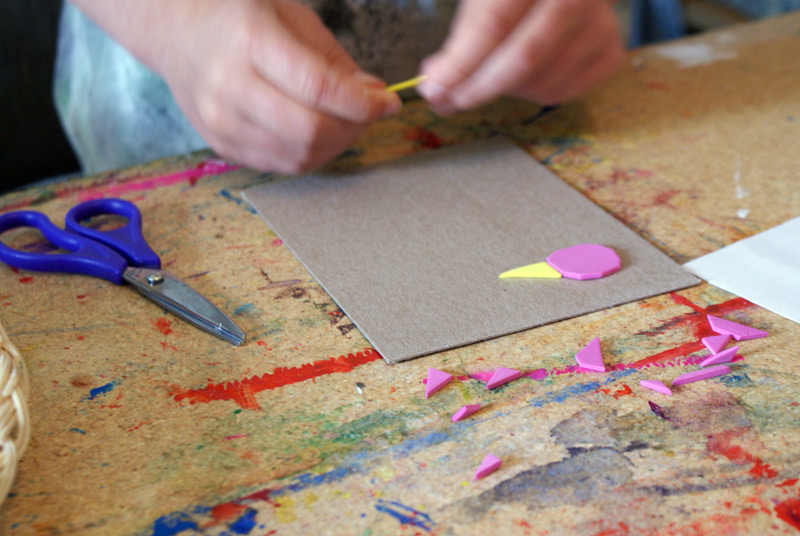
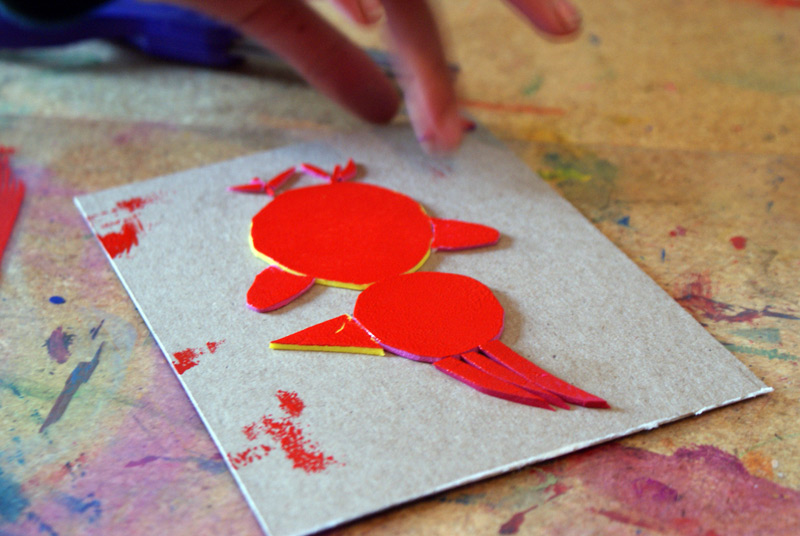
Then, they’ll cut out and glue the foam pieces to their matboard, creating their collagraph plate. Remind the students that whatever they create will come out facing the opposite direction on their print, so make any words go backwards!
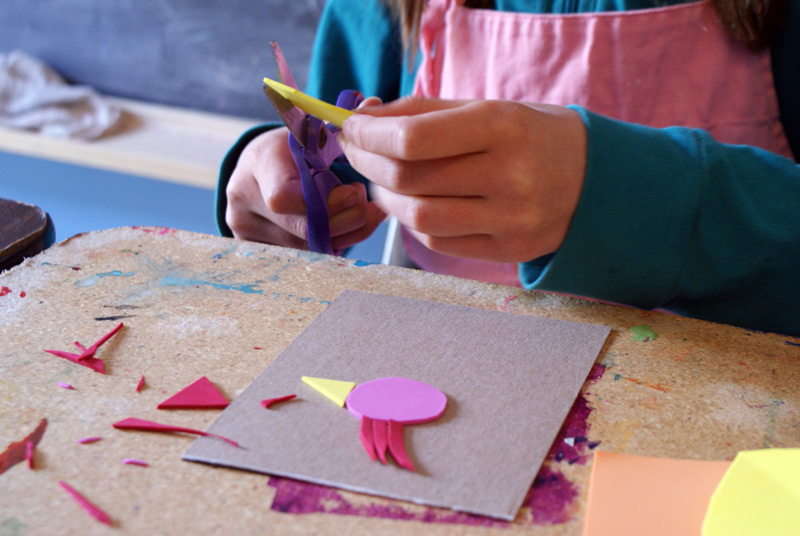
One of my students wanted to make a cartoon sequence. It was “The Life Cycle of a Flower” – but she forgot to cut out the pieces backward! oops!
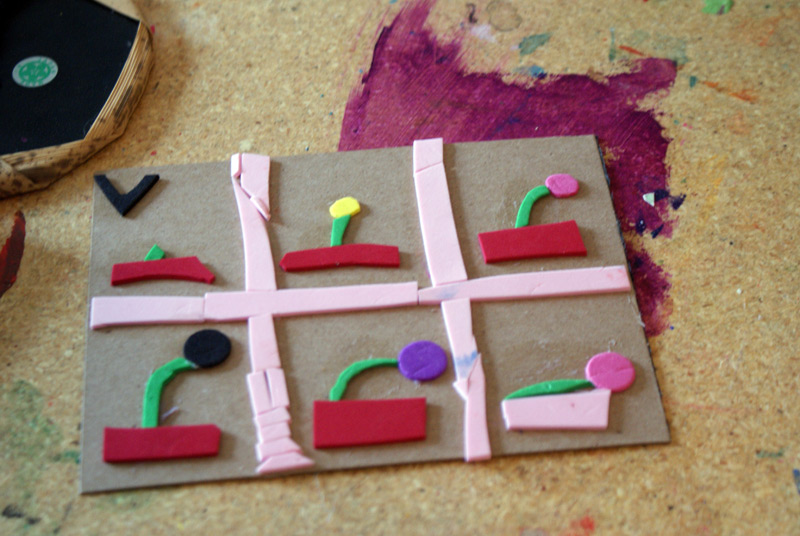
The process is pretty easy, even for the youngest kids. Older kids are going to create more advanced images or designs, where younger kids might just place the already cut out shapes in a pattern or even randomly all over the matboard.
Then, roll out the ink onto the platen. You do this by squeezing out a blob of ink, about the size of an olive. Use the brayer to roll out the ink. You should roll only in one direction to make sure that the brayer is getting completely covered. When the ink is rolled out enough, it will make a very satisfying slightly squishy noise, and the ink on the platen kind of comes up in tiny peaks. You’ll have to play around with it to know exactly what this noise is, but once you know it, you’ll always know it. 🙂
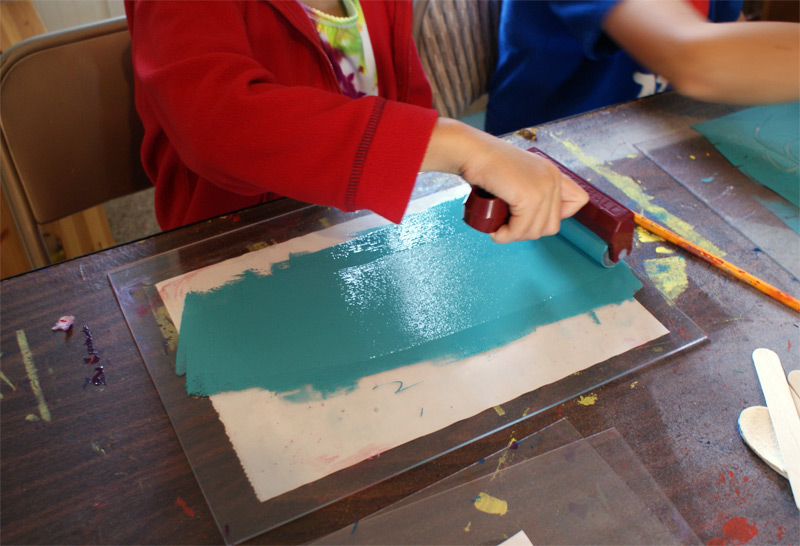
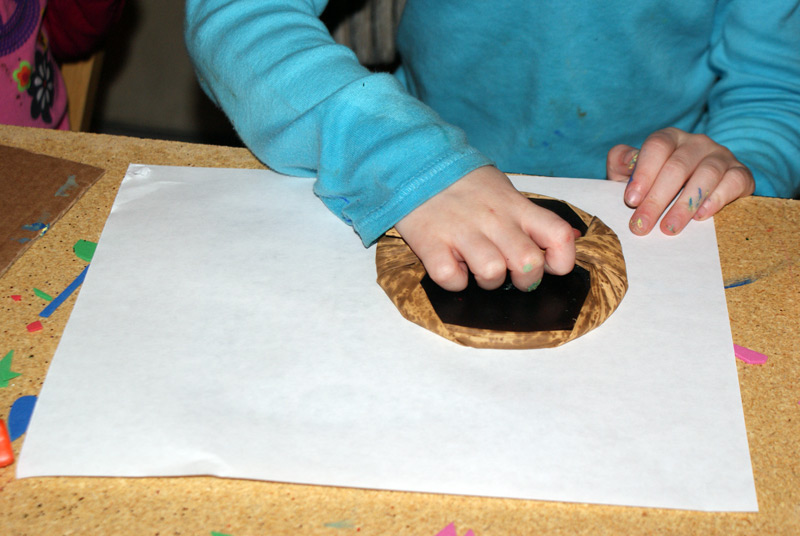
Using the brayer, roll the ink onto the printing plate. Make sure it has good coverage!
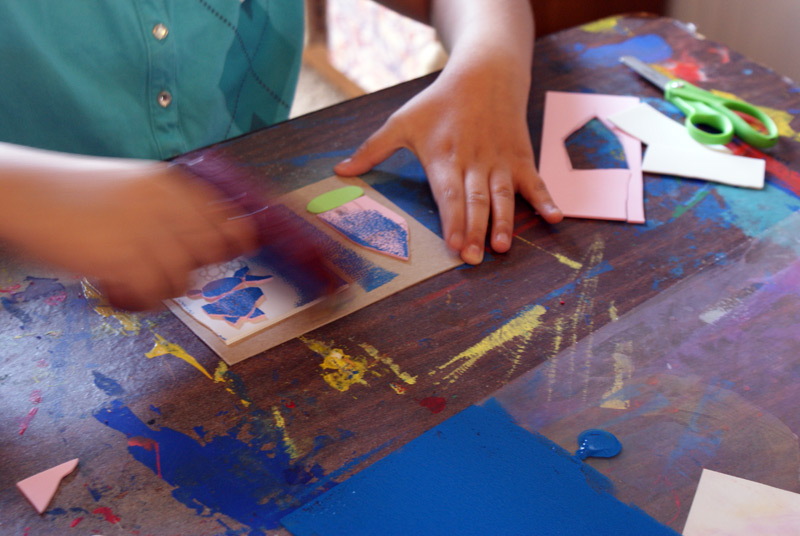
Then place your sheet of paper on top of the printing plate and use the baren (or your hands) to press and rub the paper into the plate. Make sure to rub all over the foam so that the whole thing prints.
Gently pull your paper up from the edge to remove it from the printing plate.
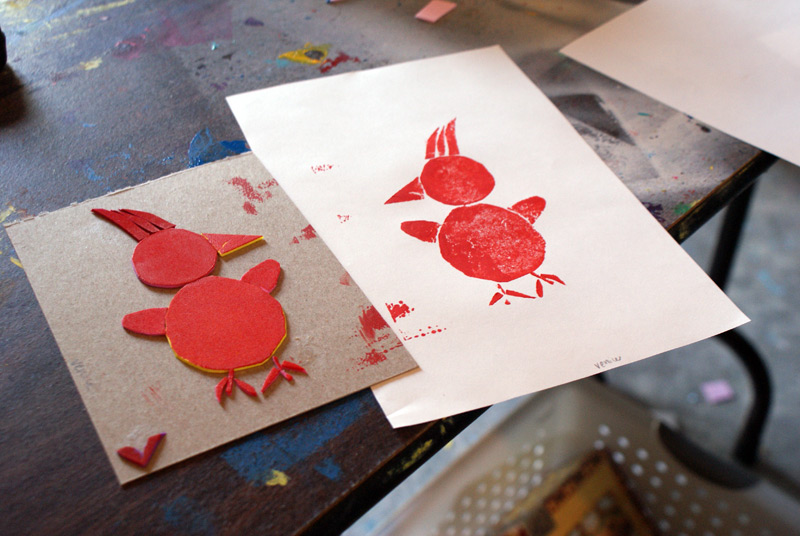
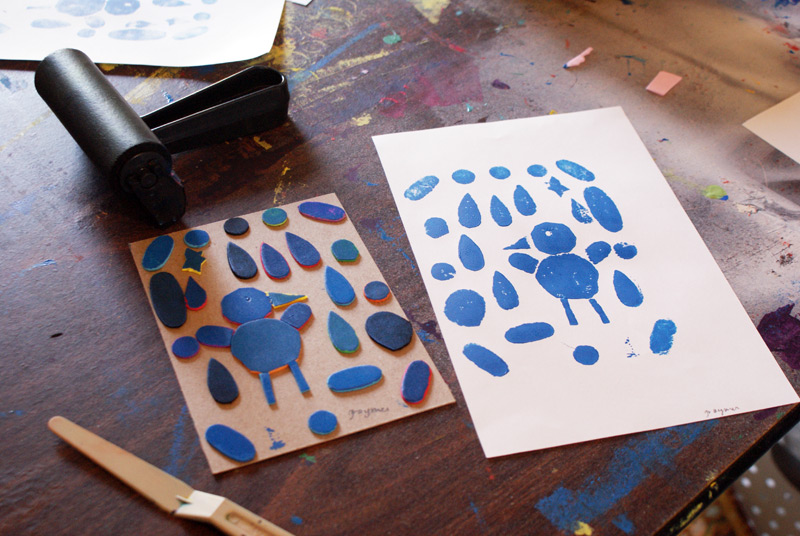
And voila! Look at that handsome print!!
Very nice!
What kind of projects are you doing with your kids today?
This post was published on Muse of the Morning.com
Here’s another printmaking tutorial- Making Monoprints Inspired by Wassily Kandinsky
Or here’s some more art with kids- How To Teach A Baby To Paint
What a great art project idea for either at home or at school. Thanks for sharing.
Pingback: Weekend Inspiration: Printmaking With Kids | Muse of the Morning PDF Sewing Patterns