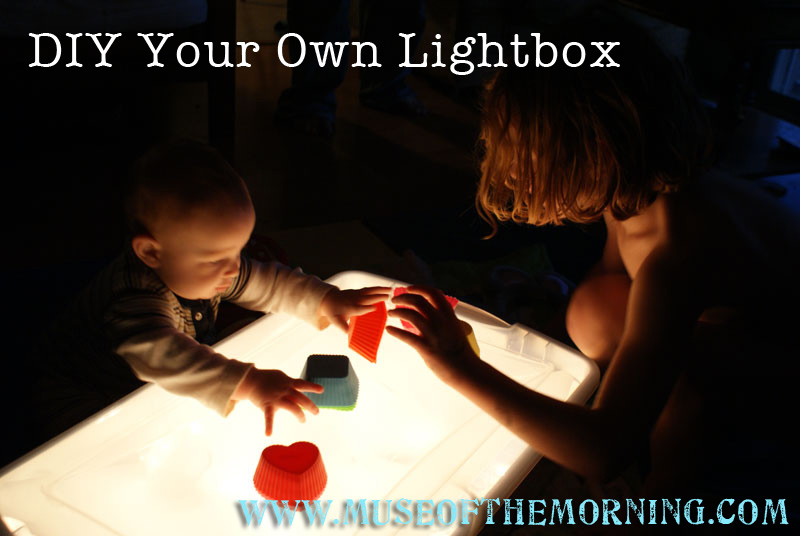
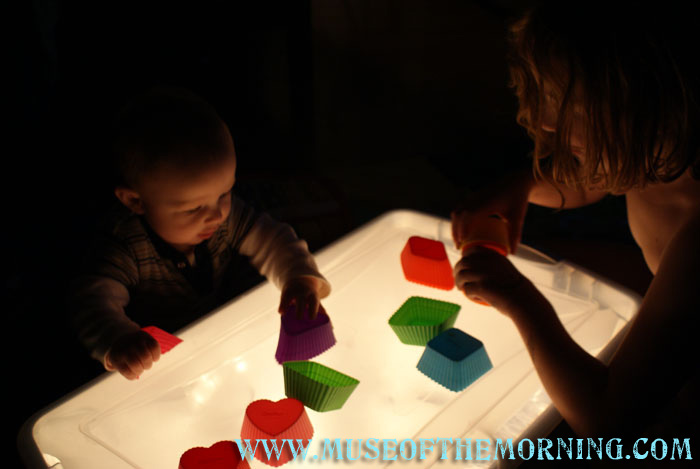
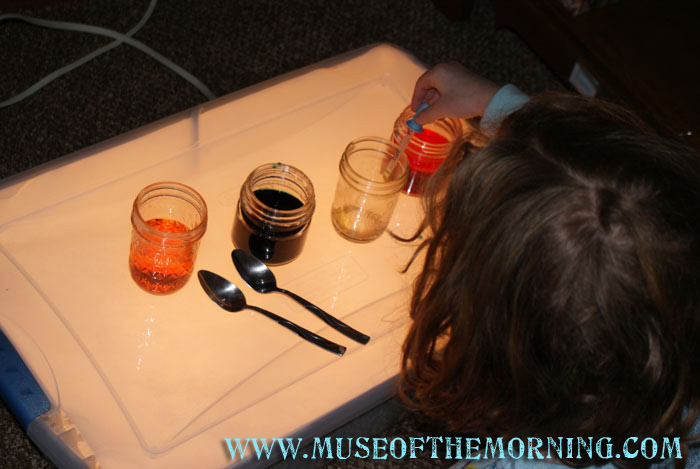
Lightboxes are so much fun and valuable in the classroom or at home! Children can use them for tracing designs and for exploring see through materials. A lightbox is great for exploring with colors and opacity. There is even evidence that light can be therapeutic to children and adults, especially in the winter, when there is less sunlight.
They can be pretty expensive though! When an affordable light box or light table can be found, they’re really too small for even one child to really be creative with, much less big enough for 2 or 3 children to gather around and use.
I stumbled upon several DIY light boxes and light tables on other blogs, but they all seemed like a lot of work or like they might not hold up to a lot of use by active children. I gleaned a lot of information from the sites though and created my own, which is very sturdy, safe and was very simple to make! It took about an hour including drying time.
Supplies:
– the largest, flattest plastic tub that you can find with a clear lid. An under-bed box is perfect size. I found the one I used for $9.00 at Walmart. You want the lid to be as flat as possible to allow for lots of play space. Ours has some ridges on each side, but they don’t interfere with play. If the one you find has the brand name raised up, you can use a fine grade of sandpaper to sand it down
– white plastic spray primer (at the hardware store, they told me I didn’t actually need this, but it definitely was important, so pick some up)
– silver spray paint
– white spray paint
– 3 strands of white Christmas lights, 100ct
– 1 extension cord
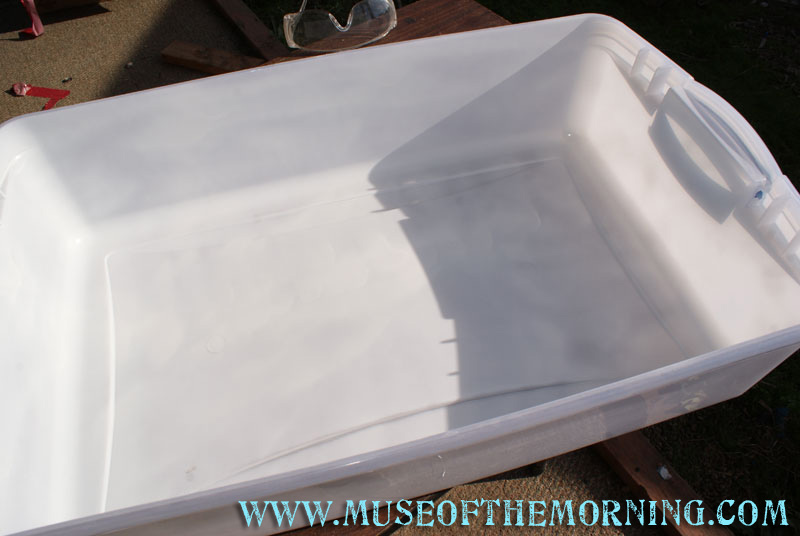
Spray the inside of the bottom and top of the tub with primer. Take care to spray the paint evenly, especially on the lid. Allow to dry and set the lid aside.
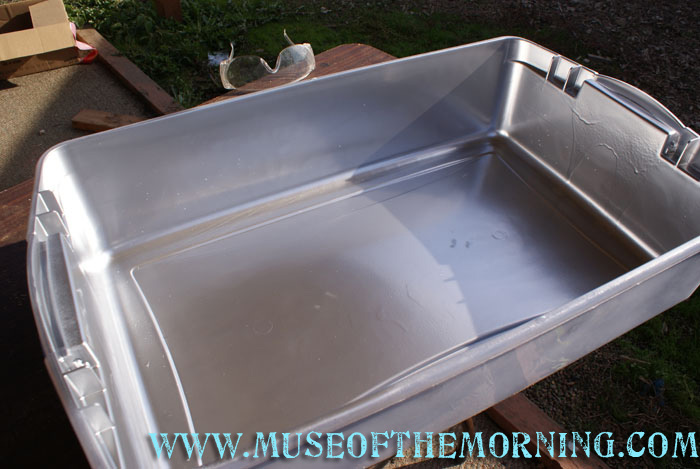
Spray the inside of the bottom of the tub with silver paint. This makes it reflective and lets the light look like its coming from all over instead of being splotchy.
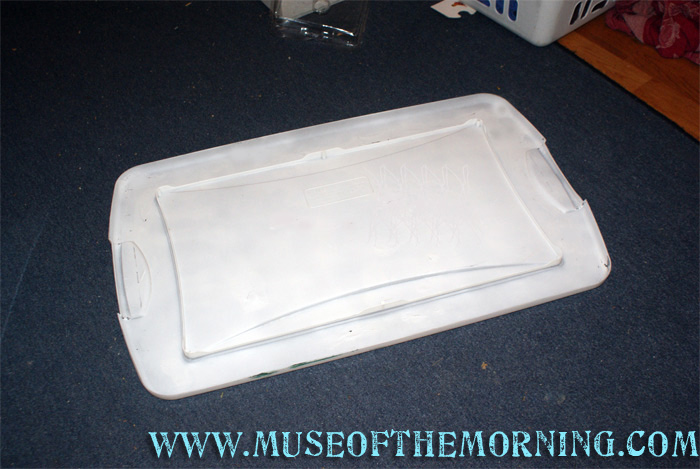
Spray the inside of the lid with just 1 or 2 coats of white paint. Again, take care to paint evenly, as splotches will show up on the play surface. The white paint diffuses the light to make it all even across the playing surface. [An alternative, is to take a large piece of parchment paper and put it across the tub part and then put the lid on, closing the ends of the paper inside to keep it taut across the surface]
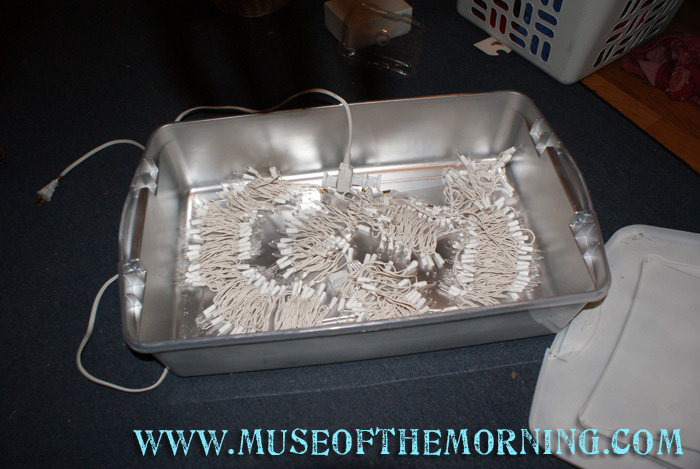
Lay the Christmas lights in the bottom of the tub, evenly spacing them out. They don’t need to be pulled apart, just kind of unfolded and laid in the bottom. Plug the lights into the extension cord. The extension cord just goes over the edge of the tub and then you can plug it in. If you want, you can cut a divot in the side of the box to make the cord fit a little better.
And you’re done! Put the lid on, plug it in, turn off the lights and see what sort of magic happens!
Here are some really fun activities and materials that we use on our lightbox! Check it out!
This post was published on Muse of the Morning.com


Thankyou for sharing thus idea! I wonder if I buy a container with a lid that is already white( rather than spray painting it white) would work? Do you think it would let the light in like a spray painted one or that it would be too dense ?
Thank you for commenting Annie. Unfortunately I think a lid that is already white would be too opaque and wouldn’t let enough light in. There are some really good containers out there with colored lids though, I wish that would work!
Like your pointers for the light box, I been searching for DYI ideas and painting the inside box silver and top lid white makes the box look like a better finish product, rather than using foil paper for the inside and parchment paper for the lid. Thanks for enlighten me!
I love this! been looking into this for a bit, I like this idea the best! Thanks for sharing!